


Looking to learn how to view your AWS bill in the AWS console? This is the article for you.
Step 1 – Make Sure You Have Access
In order to access your AWS bill, you need to have the correct permissions. There are two ways to get access:
- By signing in as the Root User of your AWS account
- By delegating access to a user by granting IAM Permissions
As a quick reminder, the Root User is the account owner of the AWS account. You access the console as the root user by signing in using the email you used to originally create the account. By default, the Root User has an elevated set of permissions including access to your AWS Billing Dashboard.
If you’re looking for a quick way to access your AWS Bill and you have access to the root user account, you can go ahead and sign in with that.
If however you do not have access to the Root User account, you will need to get access to specific IAM policies on your user account. For basic view permissions, you will need the aws-portal:ViewBilling IAM policy action. I’ll be creating a step by step article on how to configure your IAM user for billing permissions soon.
Step 2 – Navigate to the Billing Dashboard
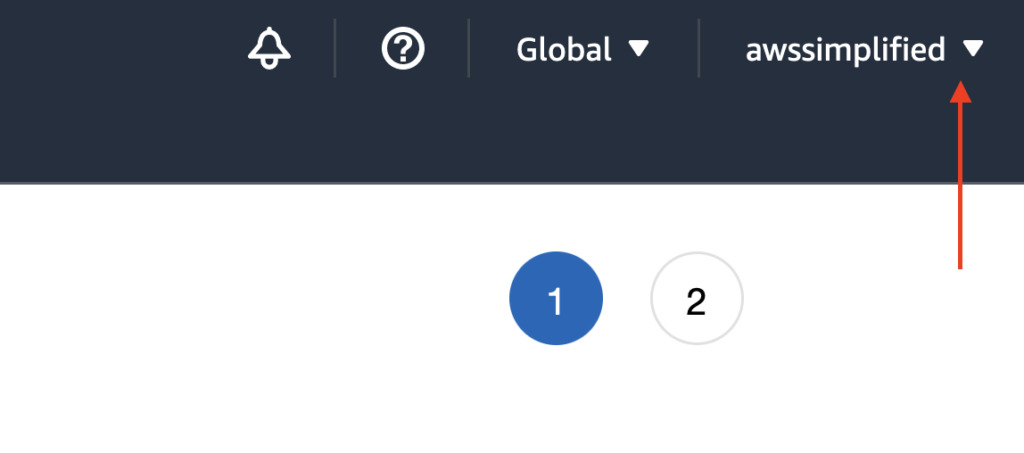
Our next step is to navigate to the billing dashboard. To do so, first log in to your AWS account. Next, click on your account name (or IAM user if you are not signed in as the root user) in the top right as seen below.
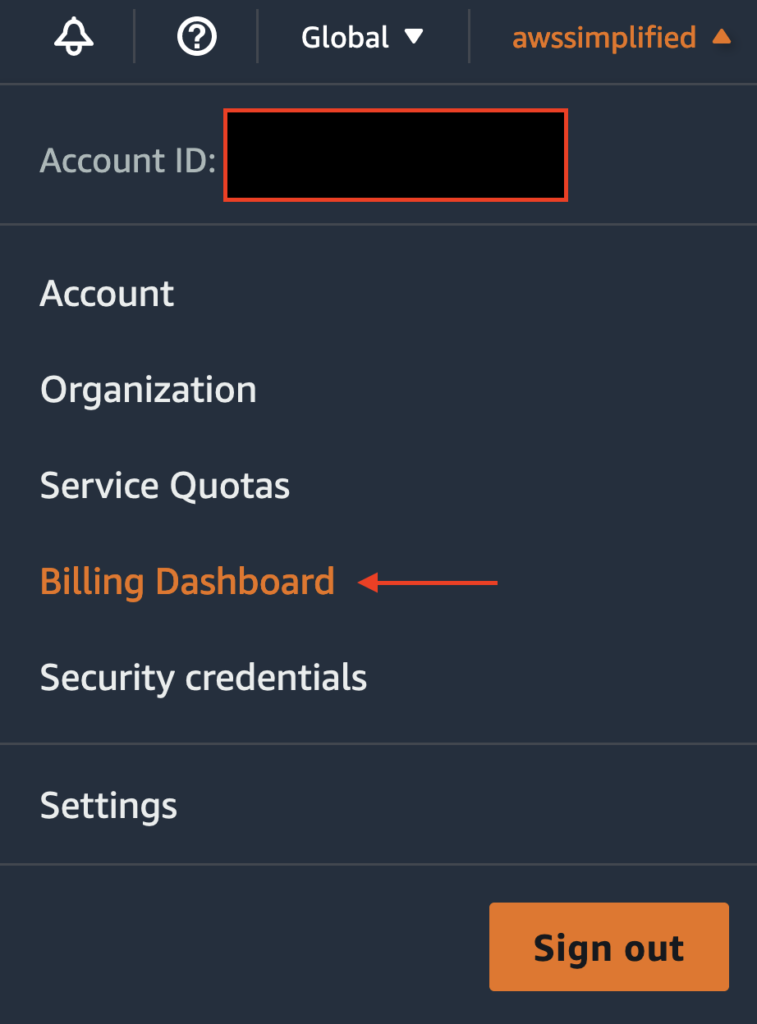
In the dropdown menu that appears, click on Billing Dashboard as seen below.
After clicking Billing Dashboard, you should be brought to the Landing Page for the billing section.
Note: if upon clicking Billing Dashboard, you received an error stating you do not have access, it means you are lacking permissions. This could either be because you are not signing in as the root user, or you are logged in as an IAM user that does not have sufficient billing dashboard access.
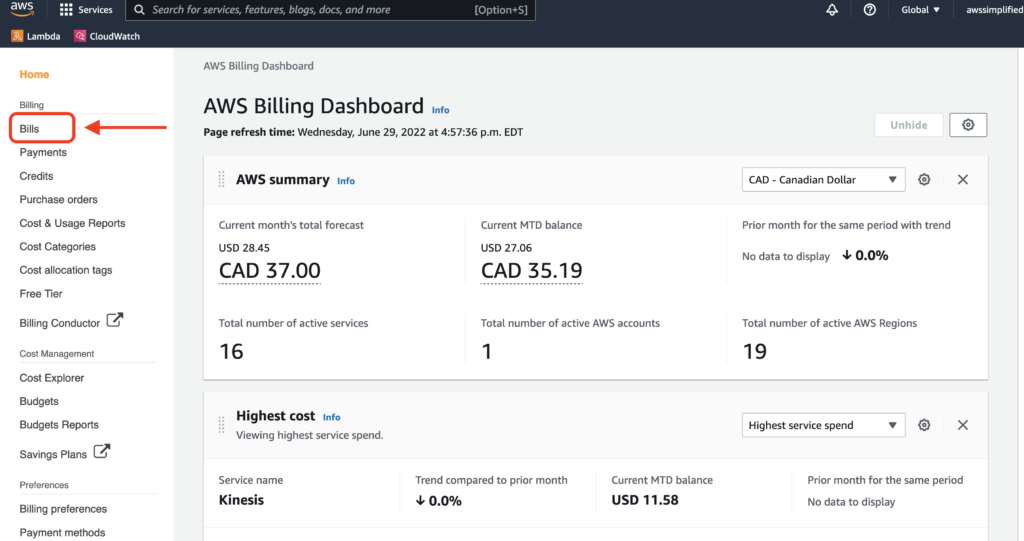
The landing page you arrive at should look something like the image below. The Billing Dashboard has been re-designed lately and has a new style that shows high level information on the initial landing page.
The top bar section shows you your monthly costs to date for the entire AWS account. If you are using AWS organizations with multiple underlying accounts, the billing will be aggregated here.
You can also scroll down to see high level information on service usage, trends over time, etc.
Also note that this page is refreshed periodically and may not necessarily be real-time. Notice the “Page Refresh Time” at the top section. As of writing, this time is lagging the current time by about 10 minutes.
To see summarized service usage cost and to view past bills, click on the Bills option on the left navigation bar.
Billing Section
After clicking Bills on the left navigation bar, you can now see the past and present bills.
Note that this is using the “old” UI. The new UI is currently not very useful doesn’t show adequate information, but it looks very similar to what yous see below.
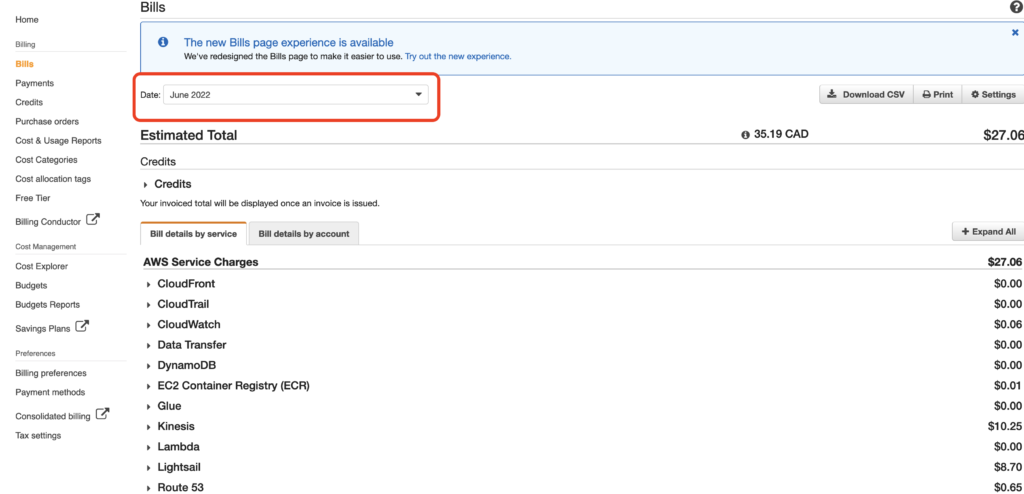
Notice you can change the date to see historic bills in the highlighted area. The AWS Service charges section is refreshed to show the current selected month.
You can explore the service charges by clicking on each service name to see details about usage.


