


Looking to setup a React application with a REST or GraphQL backend using AWS Amplify? This step by step article is for you!
If you’re a new developer to the AWS ecosystem, AWS Amplify can seem as a pretty attractive option. It allows you to setup and configure a fullstack application very quickly with minimal knowledge of AWS itself.
The best part about amplify (besides its speed in setup) is that it easily allows you to add various types of application intergrations. This includes things like databases, general storage, authentication, pubsub, and many more features. Not to mention the fact that anything you build with amplify will by default be highly scalable. After all, its hosted on AWS – so its gotta scale. In fact, I wrote a whole introductory article on the features of Amplify here.
In this article, I’m going to walk you through all the steps you need to know to set up your first AWS Amplify React project with a NodeJS based REST backend. I’m going to walk you through all the steps and show you whats going on behind the scenes.
By the end of this post, you’ll have a good understanding of how AWS Amplify works, and the AWS services its interacting with behind the scenes; of course, you’ll also have a starter project for you to build off of.
So lets get started…
Prerequisites
Note that there are a couple pre-requisites for this article. You’ll need to have installed:
Step 1 – Setting Up Our Frontend code
First off, we’re going to get started by creating a basic hello world react application with npx. We’re going to use npx and name our project amplify-demo-app as seen below. Once done, cd into your project directory
>> npx create-react-app amplify-demo-app
>> cd amplify-demo-app
Follow the wizard to create your initial project files for your application. Once its done, you can open the project directory in your editor of choice to examine the folder structure. Not much to see here at this point since its just a starter react app.
You can verify everything is set up correctly by typing npm start to run your app. It should open up a browser and look like what we have below.

Go ahead and kill your local server running the app to move forward (tip: ctrl + c usually does the trick). By default, this runs on http://localhost:3000. We’re not going to be touching the frontend much in this demo so just put it aside for now.
Lets move on now to creating the backend.
Step 2 – Initializing Our Backend
Now we’re going to move on to the bit where we get to play with amplify. We’re going to create our NodeJS based backend and run through some of the interesting things going on in our AWS account to make this all possible.
To get started, run the command below to configure your project from your projects root directory. In my case, thats /daniel/temp/amplify-demo-app .
>> amplify initYour terminal will launch into a wizard asking you various questions on how you’d like your project configured. The cool thing about this method is that amplify will auto-detect that you’re in a directory with a react based front end and configure much of the project options for you! This way, you can fast forward through a bunch of nonsense.
You should see a bunch of defaults selected that look like below:
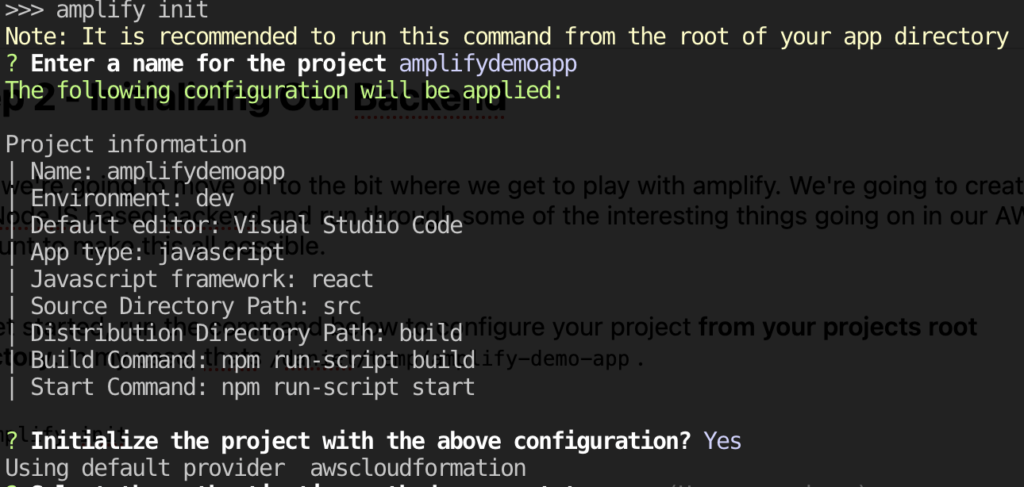
Next, amplify is going to ask you if you’d to setup your project using an AWS Profile or AWS Access Keys. If you have an AWS CLI profile already set up on your CLI, you can go ahead and select profile. You should have already done this as part of running the amplify configure command when initially setting up your CLI.

If you haven’t, go ahead and take a pause and visit the links mentioned in the pre-requisites section of this article above.
After you’ve done so, go ahead and select the name of the profile you created using the arrow keys like below. I called my profile amplify-demo-app.

Do note that alternatively, you could have clicked AWS Access Keys instead of AWS Profile. In that case, you would need to provide the IAM access key and secret access key of an IAM user with the Administrator Access IAM policy. Both means will work just fine.
Looking Under the Hood
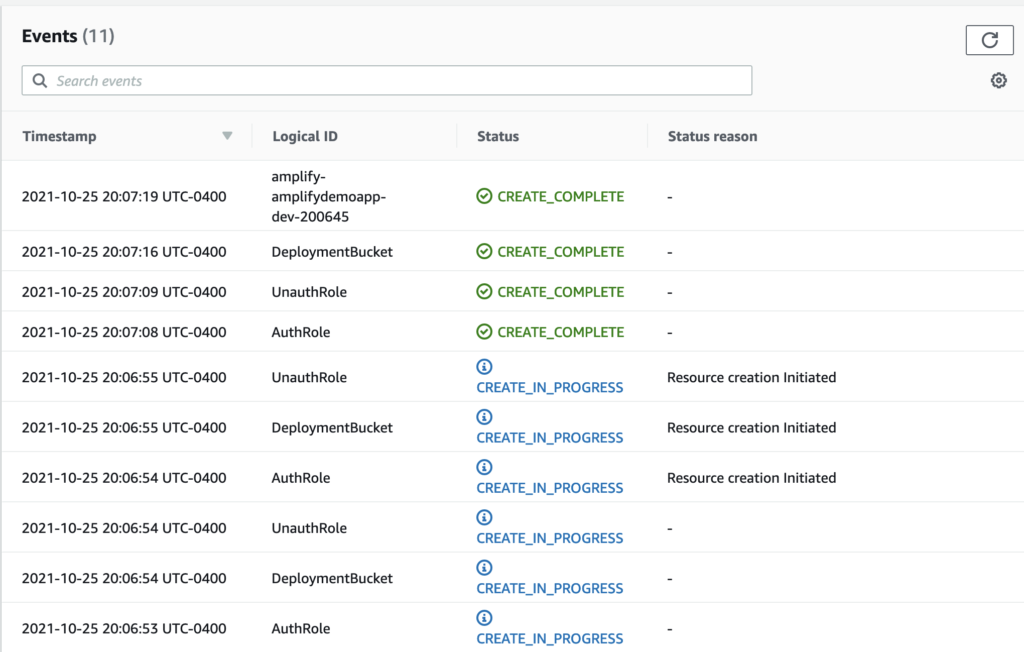
At this point, a bunch of text starts rolling down our screen like CREATE_IN_PROGRESS or CREATE_COMPLETE. What does all this nonsense mean?
It turns out that amplify is relying on another AWS Service called AWS Cloudformation. Cloudformation is an infrastructure as code service that allows developers to write template files that in turn generate resources in AWS services. You can use it to create a DynamoDB Table, an S3 bucket, an IAM Policy, and pretty much anything else that exists on AWS.
You can actually verify what Cloudformation is doing by heading into the Cloudformation section of the AWS console. You should see a Stack who’s name starts with your project name. Here’s what mine looks like below:

Clicking on our stack, and looking at the Events tab, we can see some text that is identical to what was rolling down the console screen after we pressed enter to initialize our project. These are Cloudformation status event updates that report back to us the progress of our infrastructure provisioning.
Finally, we can click on the Resources tab to see the types of components that Cloudformation created as part of this stack. Mine is below.
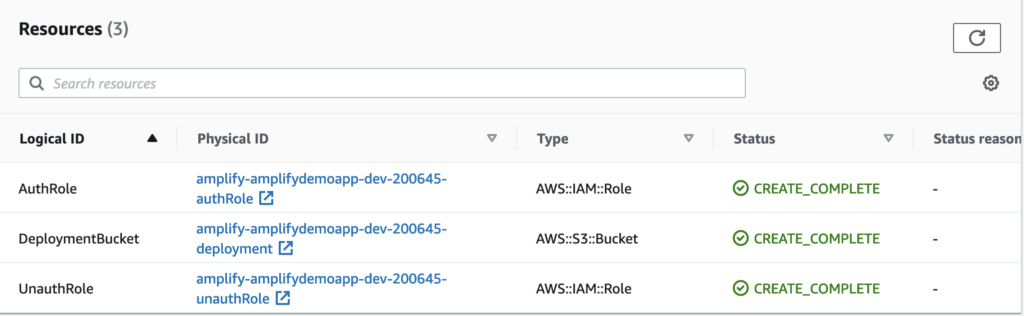
amplify init command.Notice the only things amplify has created so far are two IAM Roles and an S3 Bucket. This is a great starting point for us to add more complex elements to our project such as a full fledged backend.
But before we go there, I want to quickly head over to the AWS Amplify section of the AWS console. It turns out after we finished initializing the project, our project will now be visible in the AWS Amplify section of the console! Navigate over there now and click your project.
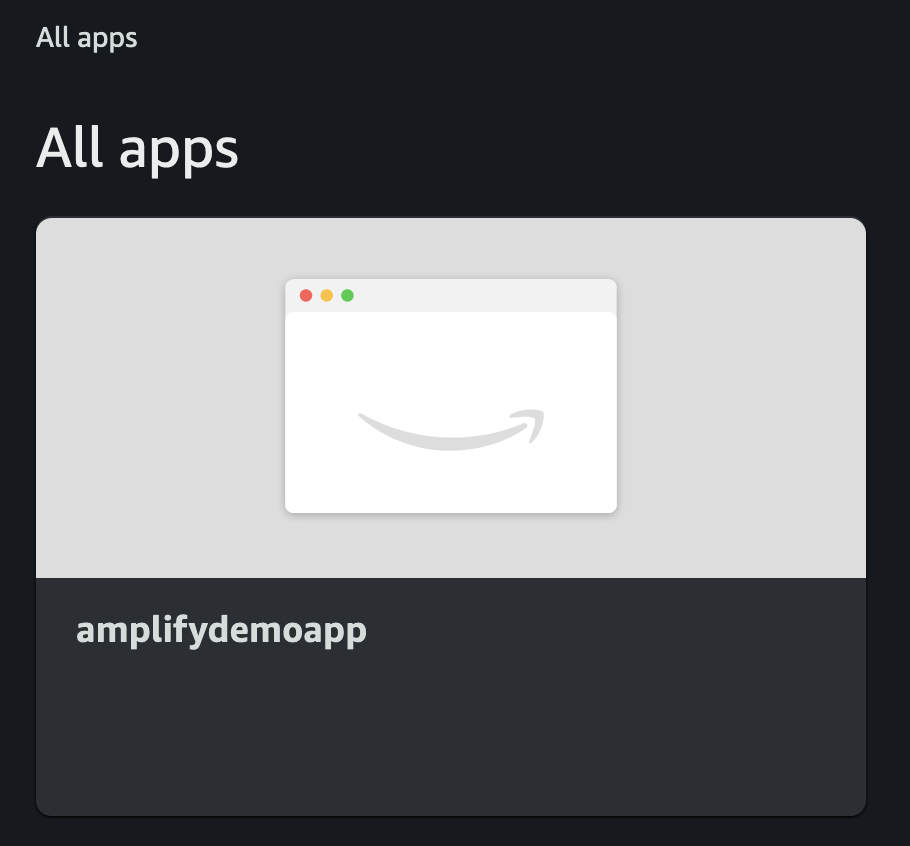
Go ahead and poke around the Amplify console for a bit. There’s nothing much to see here at the moment but we’re going to be adding a whole bunch of functionality shortly.
Alright, back to our terminal / editor…
At this point, our backend is now initialized in Amplify. After running the wizard successfully, you should notice a whole bunch of files added to your projects directory. The amplify specific resources are in the amplify directory. You should see a directory structure similar to what I have below.
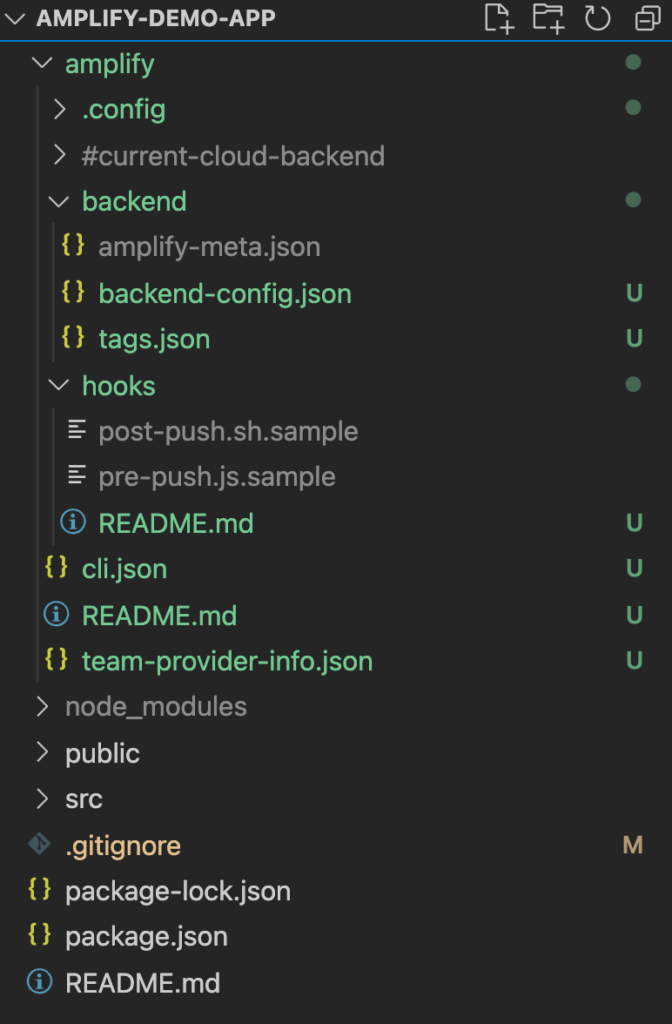
Take a few moments to look through the folder structure and files. There’s nothing magical here, its all pretty much just boilerplate.
So far initialized our frontend with a starter project, and initialized our amplify project using the CLI. This has generated a bunch of folders and files for us.
However, something is wrong here… The project just looks so empty. At this point, we’re ready to add our first backend feature, an API.
Step 3 – Adding An API
Now we’re ready to create an API for our frontend application to interact with. To get started, run the below command from your project root to star the API creation wizard.
>>> amplify add apiThe first prompt, as seen below is to decide whether you want your API to be GraphQL or REST based. For the sake of simplicity, I’m going to select REST for this demo.

amplify add api wizard.I’m going to enumerate over the next couple steps since they’re kind of boring and don’t require much explanation. Fill in the wizard similar to below. I’ve done my best to highlight the settings you need to care about and ones you can gloss over.
- Question 2 – Friendly name for your resource – Leave this as default, it doesn’t matter.
- Question 3 – Provide a path – Input /customers/{customerId} (we’re going to use a customer themed example in this demo)
- Question 4 – Choose a Lambda Source – Select Create a new Lambda function
- Question 5 – Provide an AWS Lambda Function Name – Input CustomerHandler
- Question 6 – Choose a runtime – Select NodeJS
- Question 7 – Choose the function template you want to use – Select Hello World
- Question 8 – Do you want to configure advanced settings? – Only select Yes if you know what you’re doing and want to configure things like Lambda environment variables, lambda layers, or integrations with Cloudwatch Events. I’m going to select NO here.
- Question 9 – Do you want to edit the local lambda function now? Select YES.
PAUSE – after selecting YES to question 9, your terminal should automatically open up your IDE (in my case Visual Studio Code) and navigate you to your Lambda Function’s handler file. If it doesn’t, you can find it manually by navigating to `amplify-demo-app/amplify/backend/function/CustomerHandler/src/index.js
You’ll notice that amplify has gone ahead and created this function directory and added a whole bunch of files into it. This is going to be where you’ll be placing all your backend related code for your Lambda functions.
Go ahead and modify the default code’s response so that it looks like below and ctrl + s to save. Afterwards, close the tab to resume the wizard.
exports.handler = async (event) => {
    console.log(event)
    const customerId = event.pathParameters.customerId;
    const customer = {'customerId': customerId, 'customerName': "Customer " + customerId };
    const response = {
        statusCode: 200,
    //  Uncomment below to enable CORS requests
        headers: {
            "Access-Control-Allow-Origin": "*",
            "Access-Control-Allow-Headers": "*"
        },
        body: JSON.stringify(customer),
    };
    return response;
};
As a quick explanation of what we’re changing here:
console.log(event)– Printing out our input is a very useful thing to do for debugging. This is usually the first thing I do when setting up a lambda function.const customerId = event.pathParameters.customerId;– We’re extracting the customerId being passed in from the input event.customerIdhere will basically be set to whatever is passed in as {customerId} in the URL:/customers/{customerId}const customer = {'customerId': customerId, 'customerName': "Customer " + customerId}– formatting our response to use the passed in customerId as output. Ideally we would want to retrieve this information from a database, but this is a good temporary step.body: JSON.stringify(customer)– change the input to the stringify function to our newly createdcustomerobject.- Also note, I uncommented the
headerssection to enable CORS. This is going to help us later on when we try to call our application from our react frontend during testing.
- Question 10 – Restrict API Access? NO
- Question 11 – Do you want to add another path? NO
Phew! Wizard is now done. We’re now able to push these changes up to the AWS cloud to get Cloudformation to provision our Lambda function and API for us. Go ahead and run the below command to start the process.
>> amplify pushYou’ll be presented with a confirmation screen similar to what you see below. Anytime you push to AWS and there is a difference between what you have on local, and what is provisioned on the cloud, you’ll see the delta listed in the terminal. This is a pretty handy feature to help understand what you’re going to be provisioning in the cloud.
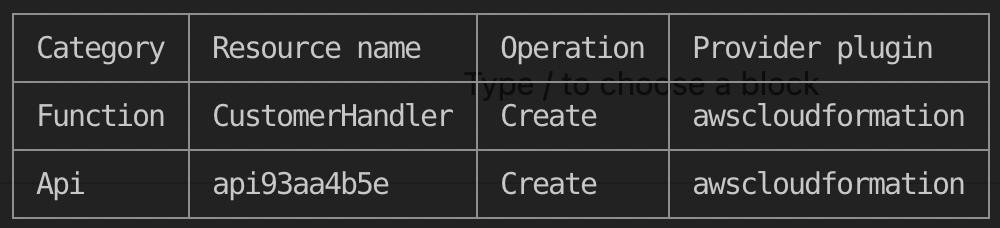
amplify push, the console gives us a preview of the resources it is about the create.Go ahead and enter YES to proceed with the provisioning.
You’ll see a spinner which will indicate that amplify/cloudformation is busy provisioning resources. You’ll also see a stream of Cloudformation status updates streaming down your screen.
While its provisioning, take this opportunity to poke around a bit more in your AWS Cloudformation stack to see the resources being created.
You’ll notice now that there are two more Nested Stacks created in your AWS Cloudformation page. These represent your API Gateway and Lambda respectively. Click around each one to see the resources amplify provisioned.

amplify push creates two nested stacks – one for API gateway and one for Lambda.After the wizard is done, it should spit out a URL that you can now hit! mine is this:
https://yken7r878a.execute-api.us-east-1.amazonaws.com/devGo ahead and hit your URL. You should see a page that looks like this (browser dependent):

The reason this error pops up is because we aren’t hitting the right path. Remember when we created our API we specified the /customers/{customerId} path? Well we need to add this to the URL in order to hit our lambda function correctly. Go ahead and add /customers/1 to the end of your API. It should look like below
https://yken7r878a.execute-api.us-east-1.amazonaws.com/dev/customers/1Boom! You should now see that our lambda function is being invoked and returning our data! Feel free to pass in different numbers for customer id like 2, 3, 4, or 5. You should see the result passed back to you in your browser.
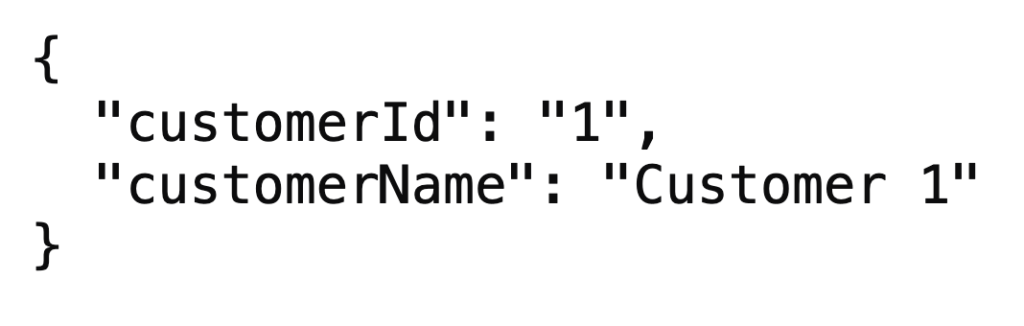
/customers/1 successfully invokes our lambda function!Ideally we would want to connect this API call to a database, but thats an exercise for a different day.
We now have a working frontend and backend. Before we move along, I want to share some other good tips for working on and developing your lambda functions.
- Testing Locally – You can run the command
amplify mock function <FUNCTION_NAME> to invoke your function locally before deploying it. - Custom Input – You can pass in custom input during mock invocation by editing the
event.jsonfile in your /src directory. - View Your Assets – You can use the command
amplify api consoleto bring up your AWS console page. This is useful if you forget your API url and a way to see the resources AWS is provisioning.
Lets move on now to learn how we can hook up our frontend to our react frontend.
Step 4 – Integrating our Frontend with Backend
In order to call our API from our frontend, we need to important a useful library that makes it easier to interact with amplify components through react.
To do this, we first need to install the ui-react components. Type in the following while in your project directory.
>> npm install aws-amplify @aws-amplify/ui-reactThis will install the ui-react component library into your project.
Next, navigate to the react part of your project and open the /src/index.js file. Paste in the code below at the top of your page right after your last import but right before the ReactDOM.Render function.
... other imports ...
import Amplify from "aws-amplify";
import awsExports from "./aws-exports";
Amplify.configure(awsExports);
Next, we want to go to our App.js file to modify our application code. CAUTION – I am a frontend noob at this point. The UI I will generate is not pretty, but it demonstrates the concepts of calling the backend and populating the results on your frontend.
In your App.js file, delete everything in the file and replace it with what we have below.
import logo from './logo.svg';
import './App.css';
import Amplify, { API } from 'aws-amplify'
import React, { useEffect, useState } from 'react'

const myAPI = "api93aa4b5e"
const path = '/customers';

const App = () => {
  const [input, setInput] = useState("")
  const [customers, setCustomers] = useState([])

  //Function to fetch from our backend and update customers array
  function getCustomer(e) {
    let customerId = e.input
    API.get(myAPI, path + "/" + customerId)
       .then(response => {
         console.log(response)
         let newCustomers = [...customers]
         newCustomers.push(response)
         setCustomers(newCustomers)

       })
       .catch(error => {
         console.log(error)
       })
  }

  return (

    <div className="App">
      <h1>Super Simple React App</h1>
      <div>
          <input placeholder="customer id" type="text" value={input} onChange={(e) => setInput(e.target.value)}/>
      </div>
      <br/>
      <button onClick={() => getCustomer({input})}>Get Customer From Backend</button>

      <h2 style={{visibility: customers.length > 0 ? 'visible' : 'hidden' }}>Response</h2>
      {
       customers.map((thisCustomer, index) => {
         return (
        <div key={thisCustomer.customerId}>
          <span><b>CustomerId:</b> {thisCustomer.customerId} - <b>CustomerName</b>: {thisCustomer.customerName}</span>
        </div>)
       })
      }
    </div>
  )
}

export default App;
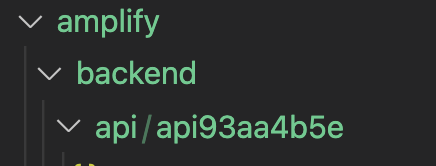
This is all pretty standard react code. I want to draw your attention the the myApi variable assignment which is currently set to the value api93aa4b5e. This value is not made up, its the name of our API when we were running through the create api wizard. If you’re not sure what your api name is, check your file structure under the amplify >> backend >> api directory. You should see the name of it, mine looks like below.
The idea of this code is to have the user be presented with an input textbox. We can put in a value and click the below button. Clicking the button will call our backend API, and append our Customers array with the new customer.
To give the tool a test drive, go ahead and run npm start from your project directory to launch the react app. It should look like below. After you do, put in a value or two and click the button. You should see a response being populated below under the Response header.
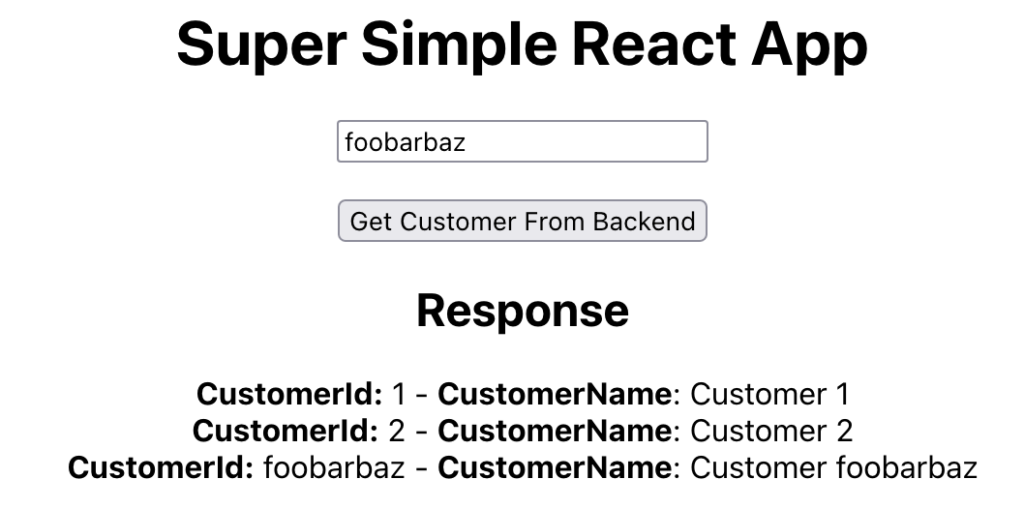
You can even go to the network tab to confirm that our backend is indeed being called as seen below.

At this point, we have our backend deployed to the cloud, but our front-end is sitting on our local machine.
We’re ready to move on to the next step which is to host our frontend on AWS.
Step 5 – Hosting Our Frontend on AWS
We’re almost there. To host your application on AWS, use the below command to add hosting.
>> amplify add hostingSelect the first option as seen below which is Hosting with Amplify Console

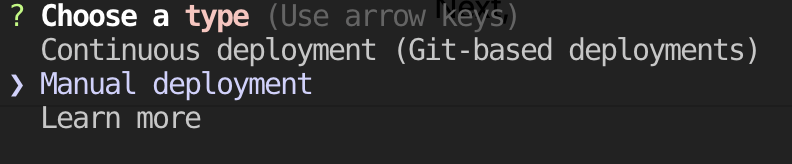
Next, you have the option of doing a manual deployment, or integrating your app with a git repository for full CD. Setting up full CD is a bit beyond the scope of this tutorial, so lets go with the Manual deployment option as seen below.
Afterwards, use the below command to launch your frontend into the cloud and deploy it on AWS.
>> amplify publishMake sure to accept the prompts that display what you’re doing to be deploying. Cloudformation event statuses should once again stream down your screen as the update occurs.
Once its done, the console should output a URL for where your application is hosted like below.

Go ahead and head over to the URL to give the application a try. Everything on this URL is hosted on the cloud and ready to scale to millions of users!
Congratulations! You’re Done!
Summary
In this article, we’ve created a full stack application using react, and hosted it on the cloud using AWS Amplify. Using this tutorial, you should have a solid understanding of what Amplify is doing behind the scenes, and also have a great starter project to build off of and make your own.
If you have any comments, questions, or feedback make sure to drop them below!


I ran into an error when using the GET request via frontend or backend link. Updating line 3 on the backend index.js file solved this issue…
Before: const customerId = event.pathParameters.customerId;
After: const customerId = event.pathParameters.proxy;
File: amplify-demo-app/amplify/backend/function/CustomerHandler/src/index.js;
Thanks for the writeup, Daniel!