


AWS S3 stands for Simple Storage Service – one of the most commonly used AWS services. It was first introduced in 2006, and since then, Amazon S3 has emerged as a popular platform for object-based storage usage. In S3, data is stored as objects within resources called buckets that offer storage space where a single object can take up to 5 terabytes in size. It is a cost-effective storage service and designed for 99.999999999 percent durability.
S3 also provides access to manage data across websites, mobile applications, backup and restore big data analytics, and many other applications. If you are also using S3 to store your data, then in one case or another, you may have come across a scenario or may need in the future where you need to copy your files between two different AWS S3 buckets within the same account.
In this post, I will show you how to copy files between one S3 bucket to another S3 bucket without having to write any scripts or write any piece of code at all. And the good thing is all of this is going to be directly through the console. So, without any delay, let’s dive deep into our topic.
Note: Keep in mind that this won’t affect files in the source bucket, so it’s effectively a copy command from one location to another.
If you are interested in watching a video instead then click here to view it now
Step 1 : Defining your buckets
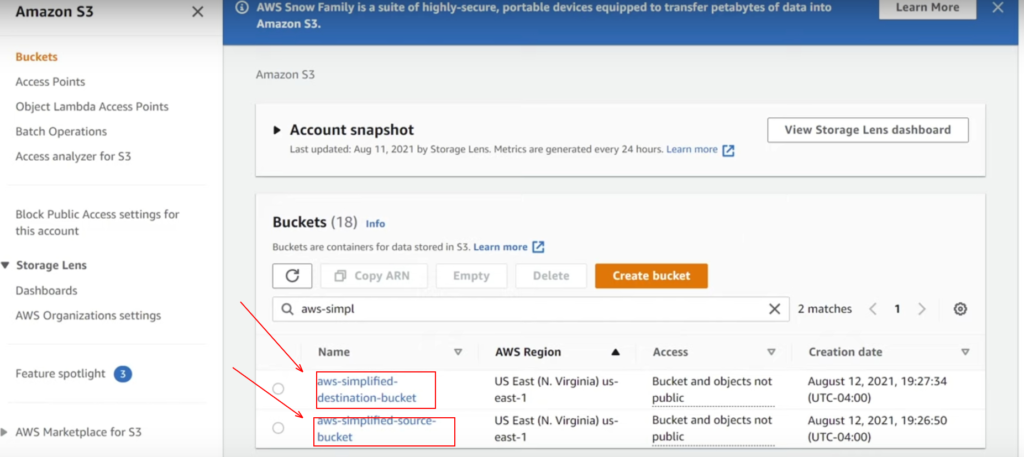
In the S3 console, and I have two different buckets that are already pre-created here. For demonstration purposes, I already created them, one of them is named aws-simplified-source-bucket, and the other is the aws-simplified-destination-bucket. These are the two buckets where I want to transfer my files from the source bucket to the destination bucket.
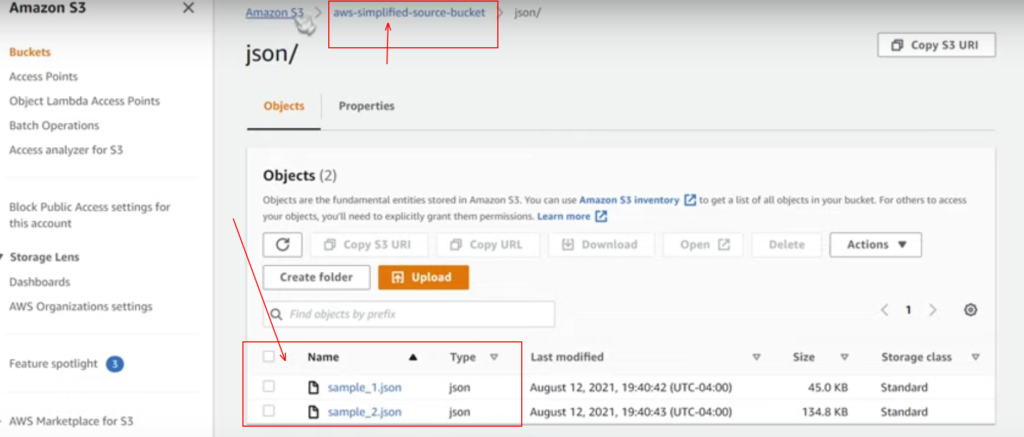
So if we take a look inside the above source bucket, I have uploaded two small JSON files in a folder just for demonstration purposes.
If we just go to our destination bucket, we should see this as empty, which of course, should be as we want to transfer files between these two buckets from the source to the destination.
In fact, as I already mentioned, this is going to be through the same AWS account, and in case if you are to do this in a cross-account way, there’s a great blog post that you can check from here.
Step 2 : Data Sync
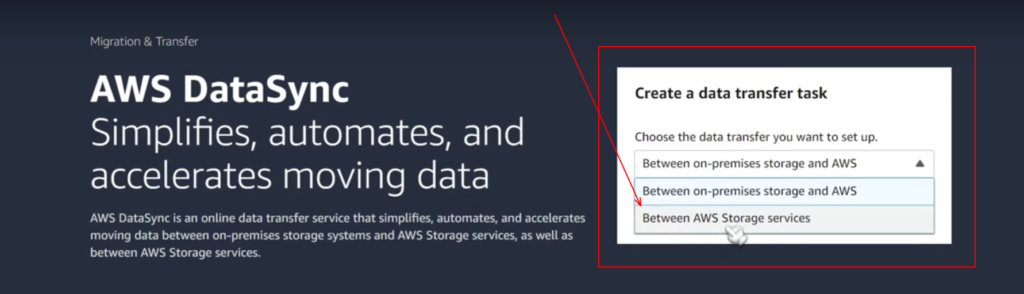
In the next step, we will use a service called AWS Data Sync; this is a new feather in the hat of AWS that lets you sync data from source bucket to destination bucket comfortably. You can just type Data Sync or AWS Data Sync up in the search bar, there you can find the tool. With this, you can automate the acceleration of data from on premise to the cloud or vice versa or between AWS Storage services.
You can see the wizard from below, where it is showing us what option we want to choose for the data transfer between on premise storage or AWS storage services. Here in this demonstration, as we are going to transfer between two AWS S3 buckets, I tend to choose the option as “Between AWS storage services” and click on Get Started.
Step-3 Setting up Configurations
In the next step, we need a whole bunch of settings regarding where our files are located. It involves 4 steps in setting up things for you.
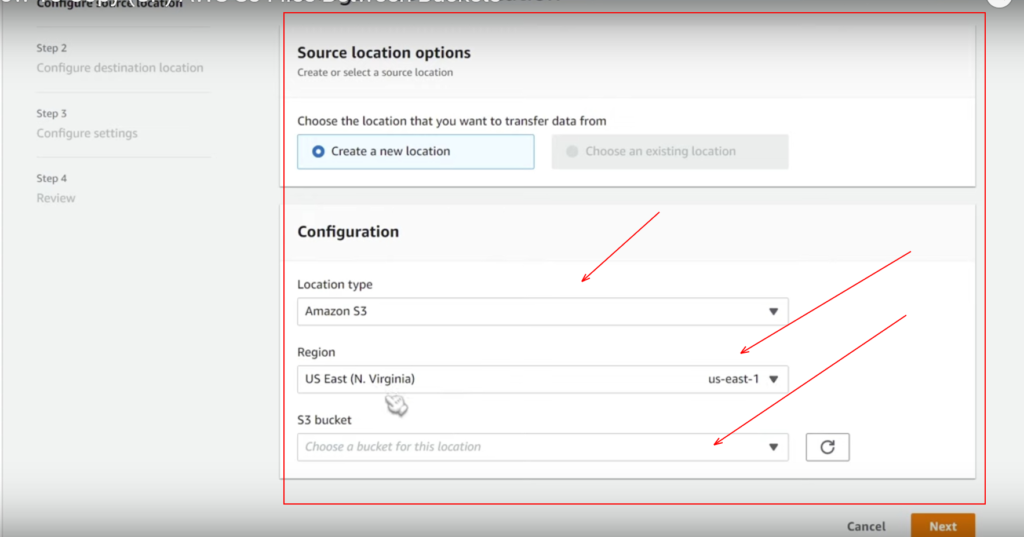
Sub-step 3.1 : Configuring the source location
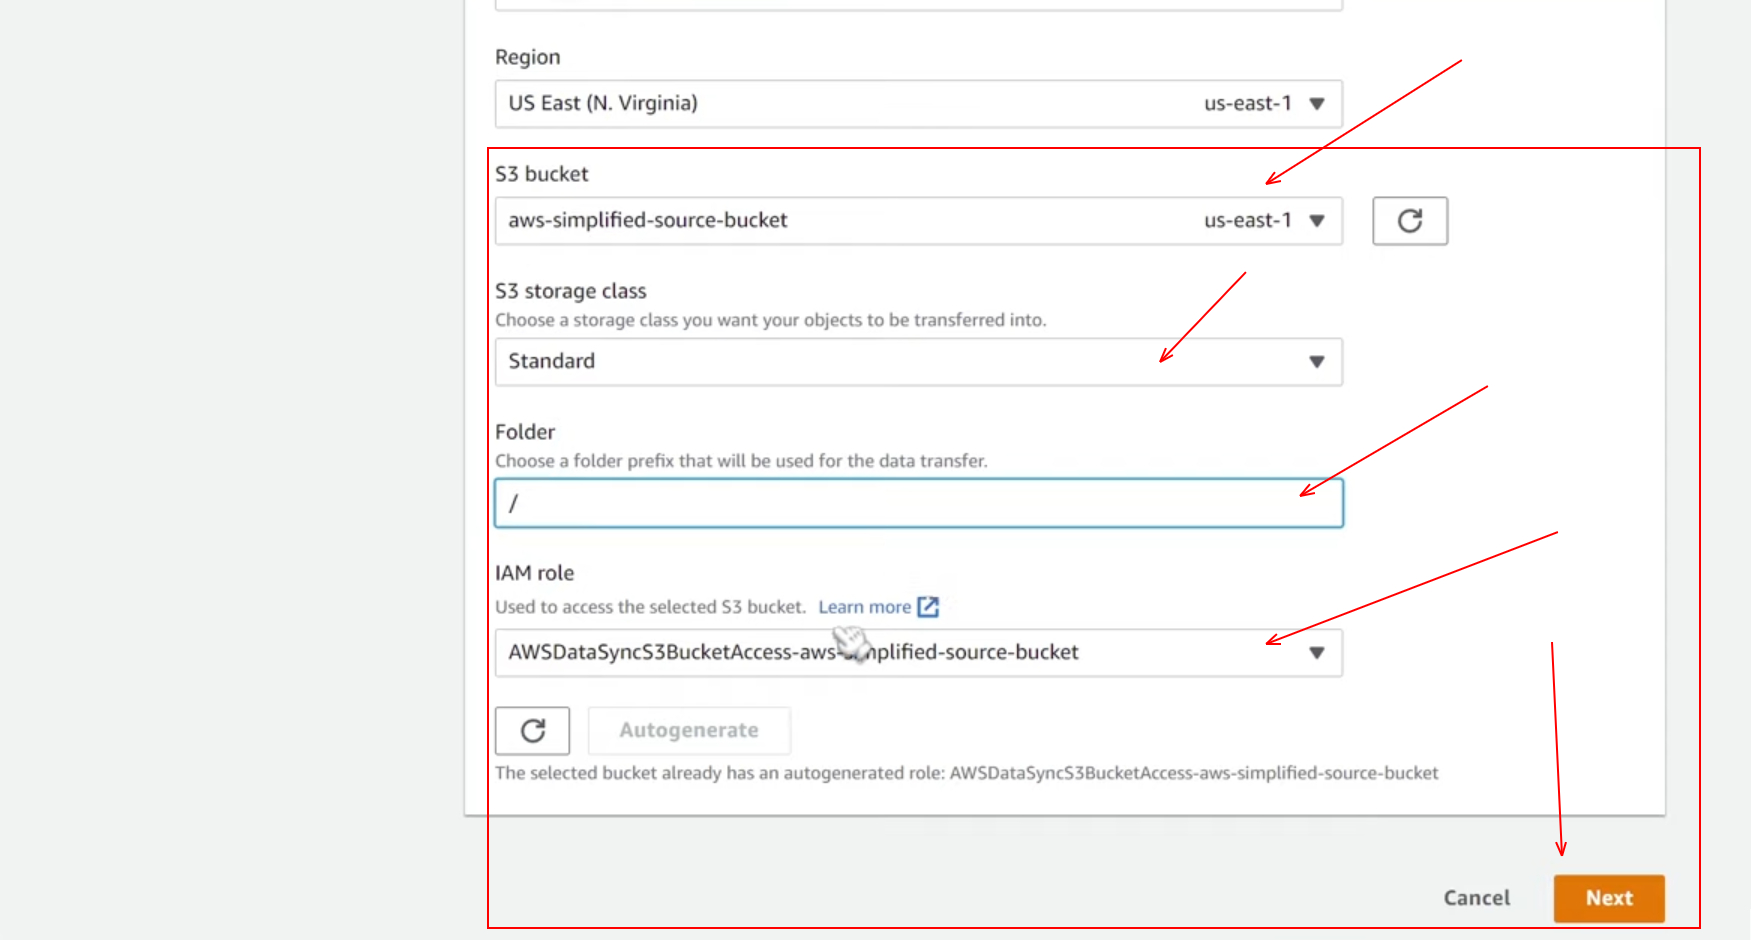
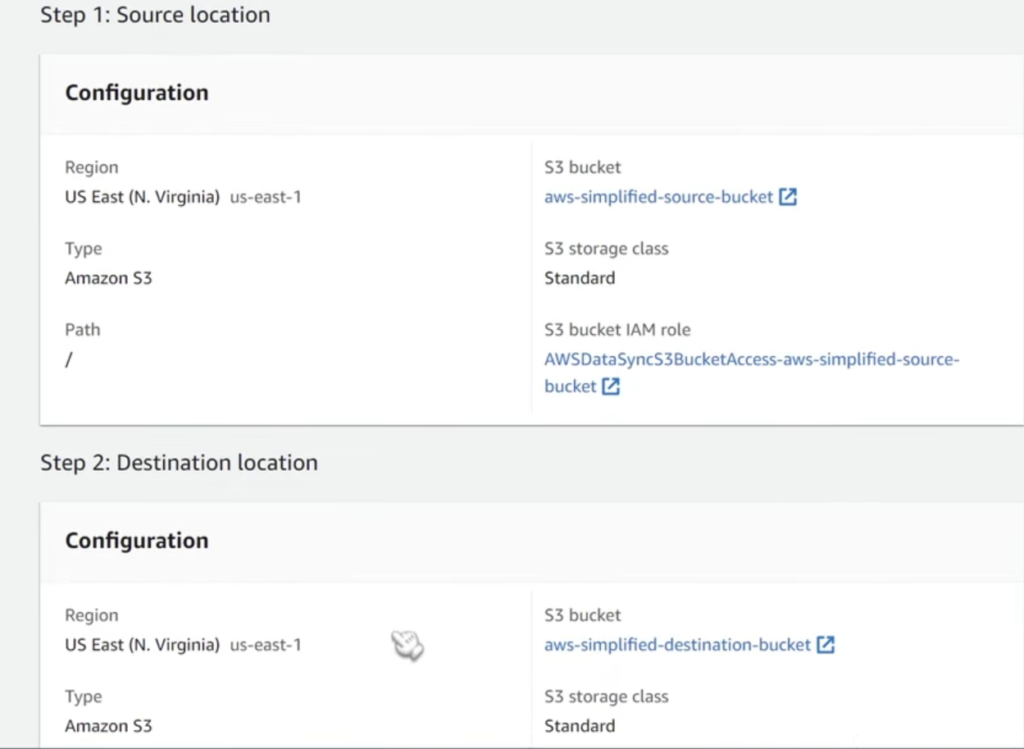
Here in the first sub-step of step 3, we need to configure source location. So we want to pick choose a new location, and then we have different other parameters to configure as well. You can refer to the below screenshots to configure the source location.
Sub-step 3.2 : Configuring the destination location
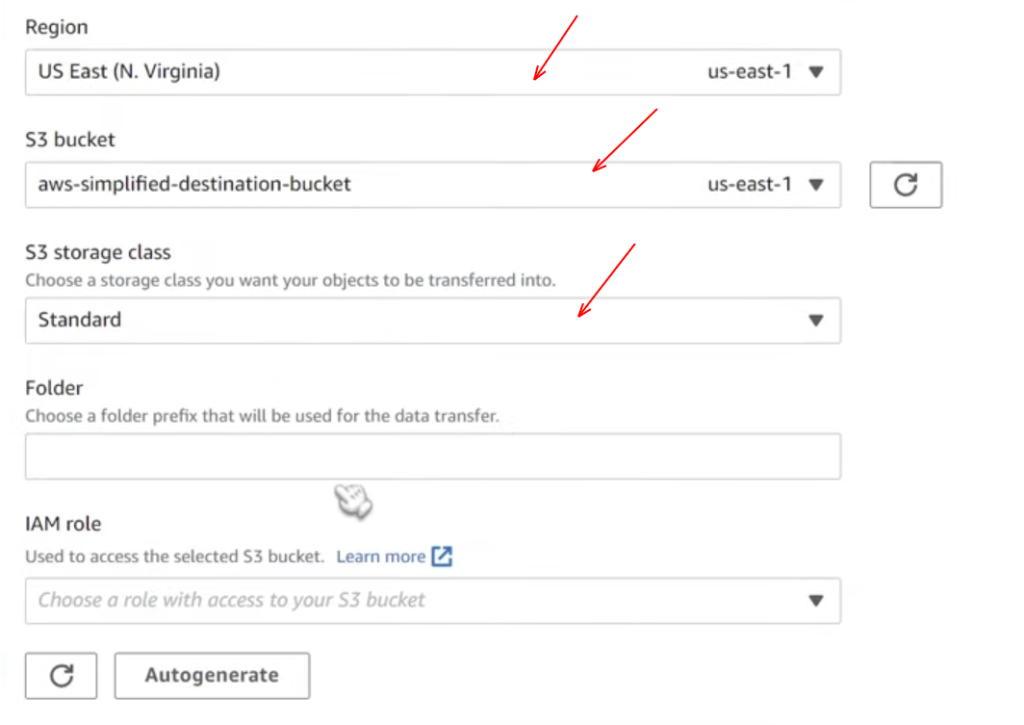
Here in this step, you need to configure the destination location. This is pretty much going to be all the same as what we did in the previous sub-step. You can refer to the below screenshots to configure the destination location.
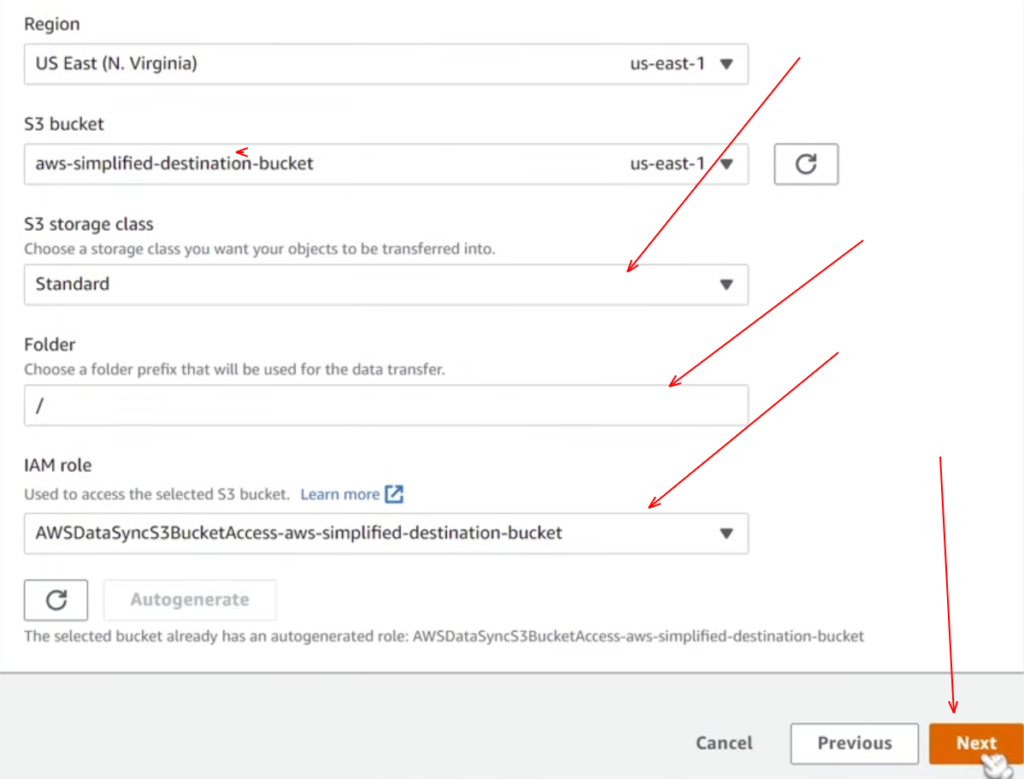
Now we can go ahead and click on next. As soon as Data sync is configured, you would see a success pop-up intent in the Green color.

Sub–step 3.3 : Configuring the task
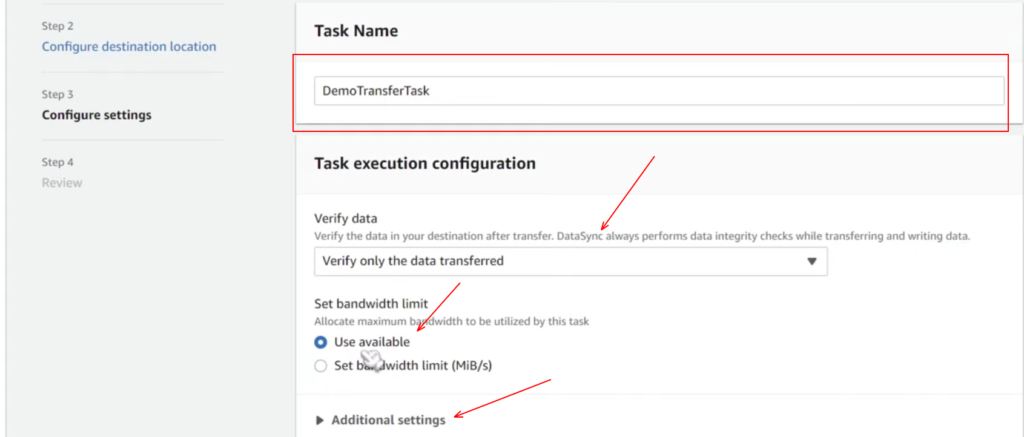
Now we need to configure settings for what’s called a task, and a task is going to be the actual thing that’s going to run the transfer. Let’s configure the task.
Task name: Demo Transfer Task
Verify Data: Verify only the Data Transferred ( Here on clicking markdown, we have a bunch of different options here, but I am going with this, and this one does only verify the data that gets transferred to destination )
Set Bandwidth: Use available ( Again, here we have multiple options, and as I want Max speed, I am going with this, but if you have any constraints kind of throttle or limited bandwidth, then you can choose accordingly)
For additional settings, you can set up queuing, which is a good thing to have on.
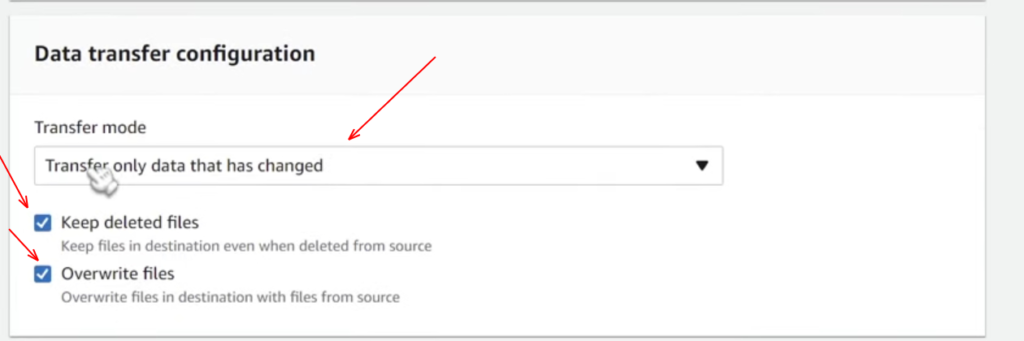
Now we have a Data transfer configuration in the next which has two options: transfer only data that has changed, or you can transfer all the data. Here I am going with the option to transfer only data that has changed as it is cost-effective and It’s fine for most people. Still, if you have any specific use case where you want to trigger a whole bunch of operations every time a file gets uploaded, then you can choose the other. Be cautious as it’s going to have larger cost implications as well.
Then you have the option of keeping the deleted files, You also have the option to overwrite files as well, you can check the below screenshot to refer to the same.
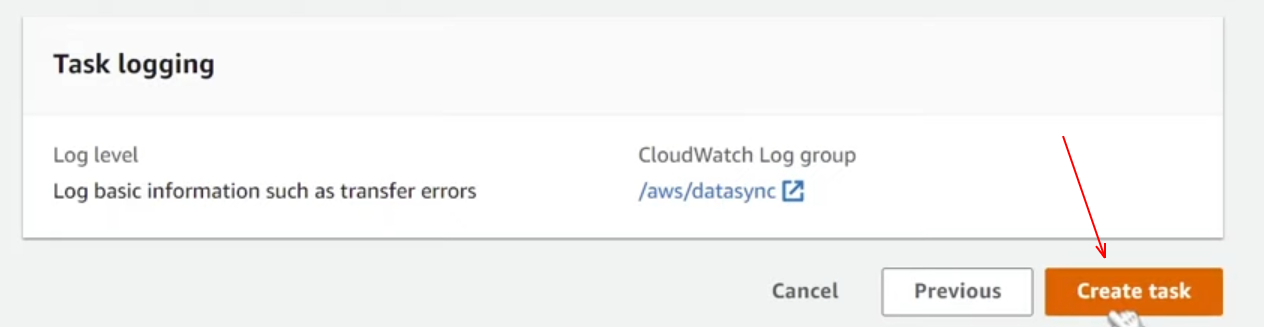
Additionally, we have some other general options down here for filtering configuration; you also have the option for the schedule if you want this to be a regular job. Well, here we’re going to invoke it manually. Then you have some configuration for task logging as we don’t really care about this. I am going ahead to click on next in the bottom right corner.
Step 4 : Task Creation
In this step, we are going to review our configurations once again and once you feel like everything is pretty much good, then click on create a task from the bottom.
Now, after a few seconds, we can see a data sync console where it shows that our task status is available, and at the top right corner, you can find an option as a start; once you click on the drop-down you have two options: start with defaults and start with overriding. You can check the same from below screenshot.
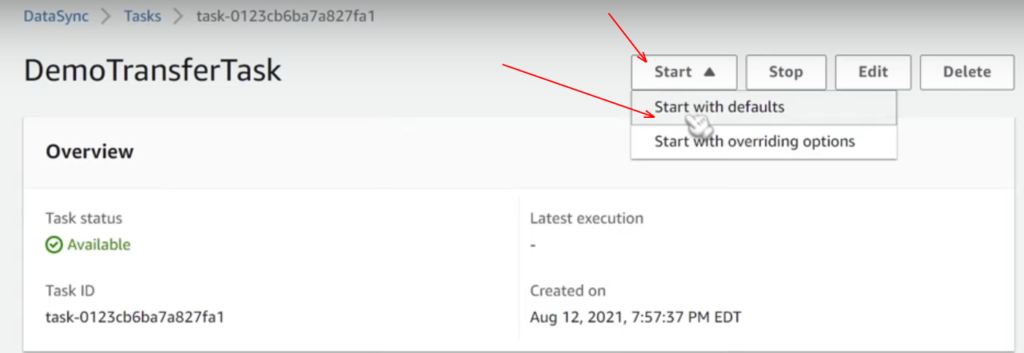
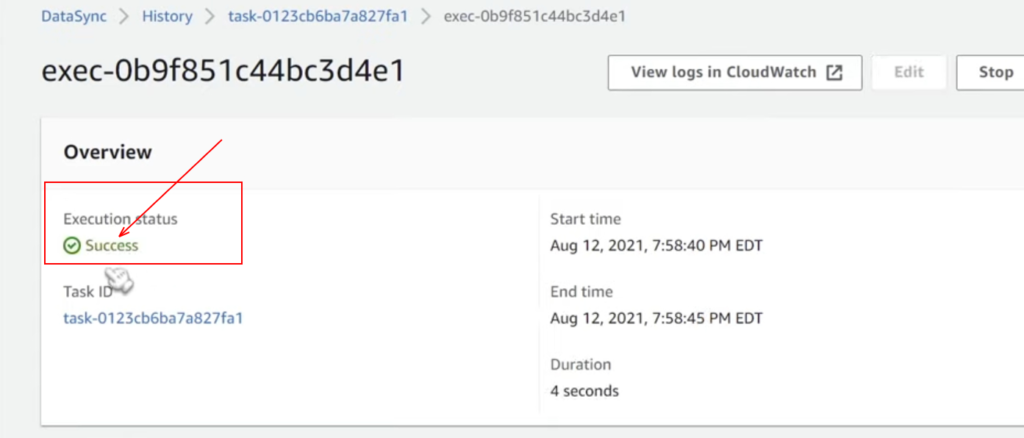
We are going to use the option “ start with defaults” to click on that, then a green pop intent showing as executed started and now task status changed to running. After waiting for a few minutes, we can see task status changed to “ success,” and boom, there you go.
Result :
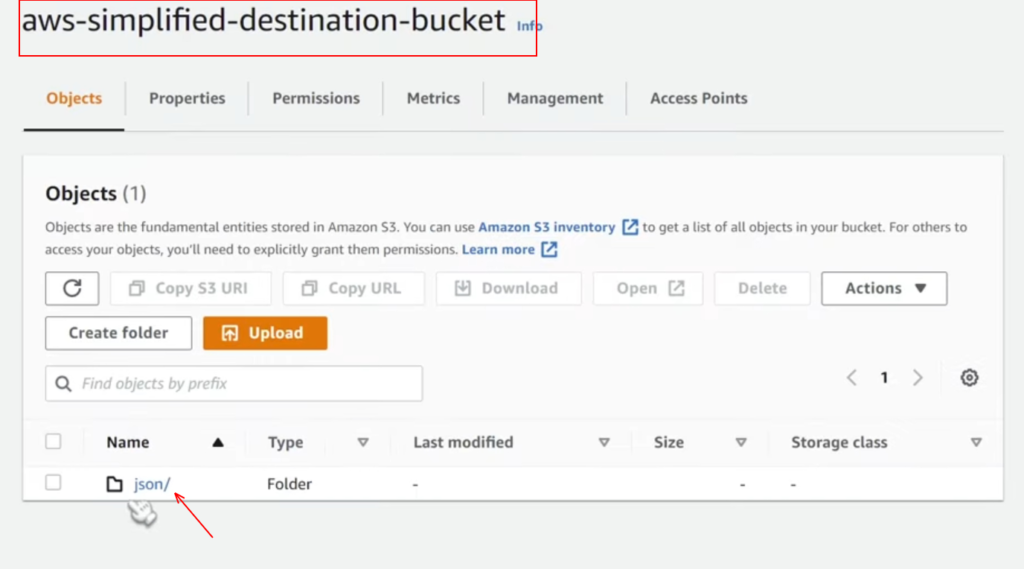
Let’s go check out our S3 bucket to make sure everything worked, so we go back into our S3 console, filter your bucket that is the destination bucket. If you have followed me from the start, then you can see everything transferred to the S3 destination bucket now from the source bucket, and alas! Now we have all of our data that is our JSON sample files and you can observe it from the below screenshot.
Conclusion :
I hope this post was able to help you in copying files between two AWS S3 buckets within the same AWS account without writing any single piece of code or any additional scripts. Hope this process seems simple, quick, and easy for you, and with this note, I encourage you to check out my previous blogs and consider subscribing to my newsletters.


