


You might have been using AWS for quite some time and hopefully, by now, you feel comfortable enough accessing various services of AWS via its web console UI. But have you ever thought like “are there more ways to access its services apart from the default eye-catching browser console?”
Alright! If you have this in your mind, then indeed, I have a better solution for you, and it is by using the AWS CLI (Command Line Interface) that can help you unlock the further potential when managing your AWS ecosystem. If you are just getting started with AWS, then AWS CLI is a great way to interact with your AWS resources, and that’s through your terminal using the CLI.
Without any further setback, through this blog let me tell you in brief about AWS CLI and will walk you through step by step process of Setting up AWS CLI on Windows 10.
What is AWS CLI?
The AWS Command Line Interface (CLI) manages entire AWS services through a terminal session on your own client, allowing you to control and configure multiple AWS services done programmatically. It is a unified tool to manage your AWS services. With just one tool, you can download, configure, control multiple AWS services from the command line and automate them through scripts.
The more you use the AWS CLI, the more you’ll realize how powerful it is, so on this note, let me quickly walk you through the process of setting up the AWS CLI on your windows PC.
Step 1 – Download the AWS CLI
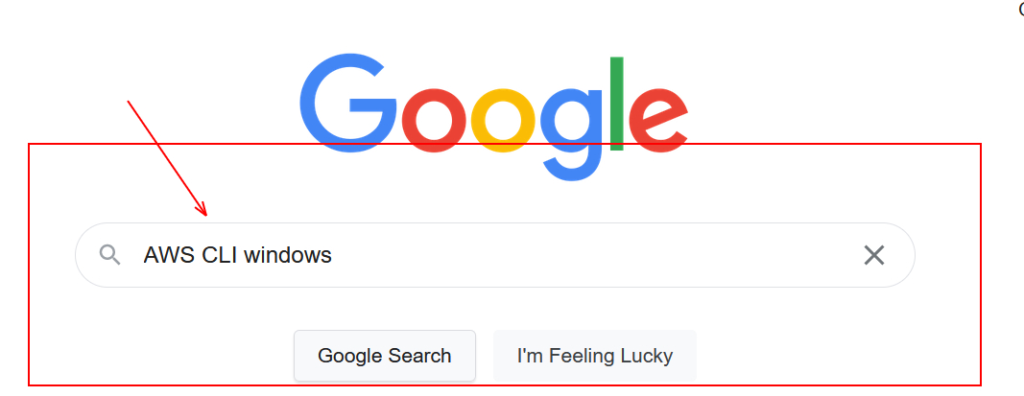
Once you are on your PC, open your browser and search for the term “AWS CLI windows” in your Google search.
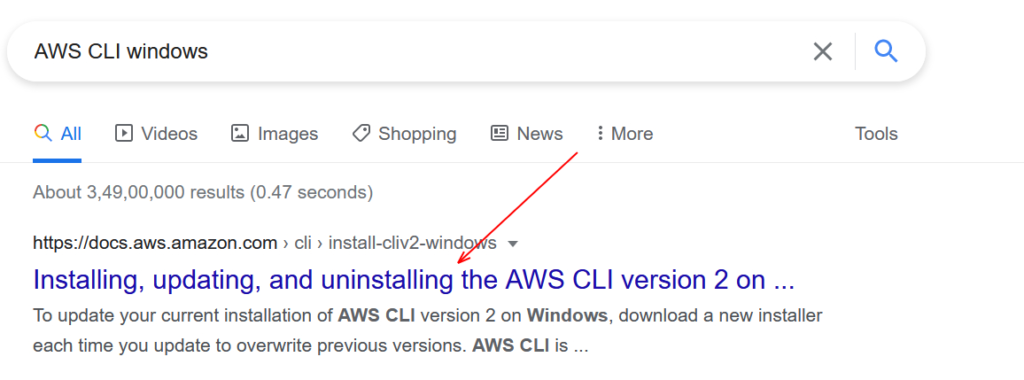
Then click on the first link, ‘Installing, updating, and uninstalling the AWS CLI version 2 on Windows’
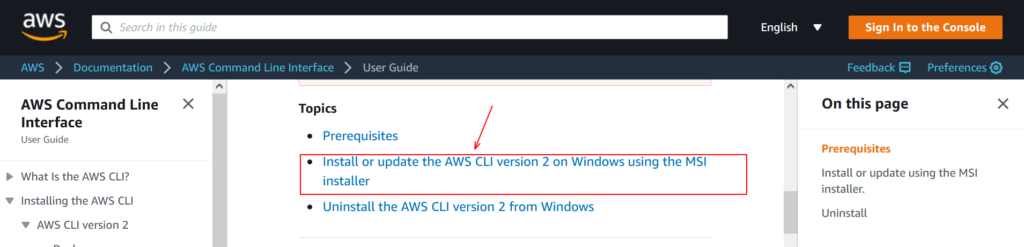
Scroll down and look out for the link ‘install or update the AWS version 2 on windows using the MSI installer and click on it.
From there now download the AWS CLI with the link given below the line “Download and run the AWS CLI MSI installer for Windows (64-bit)” as soon as you click on the link, the download will start automatically, and all you need to do is install the AWS CLI as same as you generally install any software application by accepting the terms, clicking next and then finish to install.
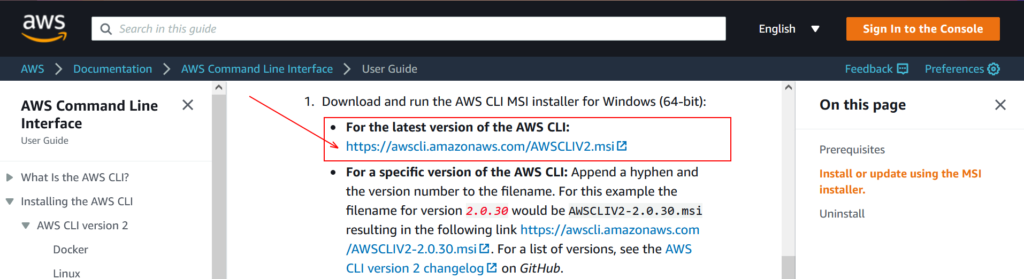
Alternatively, you can directly download the AWS CLI MSI installer for windows from here.
After you open the installer and follow the wizard, you should be ready for step 2.
Step 2 – Configuration ( If you are first time user)
If you are first setting up the CLI, there are some additional steps to interact with AWS. You need to create a user profile using the command “aws configure” but before that; we have a few other steps to perform.
Looking to create your infrastructure through CODE? Check out THIS blog post on CloudFormation
In this process, the first and foremost thing you need to do is create a user with a set of permissions. In AWS, interacting with services requires explicit permissions defined by your IAM user (more on that below).
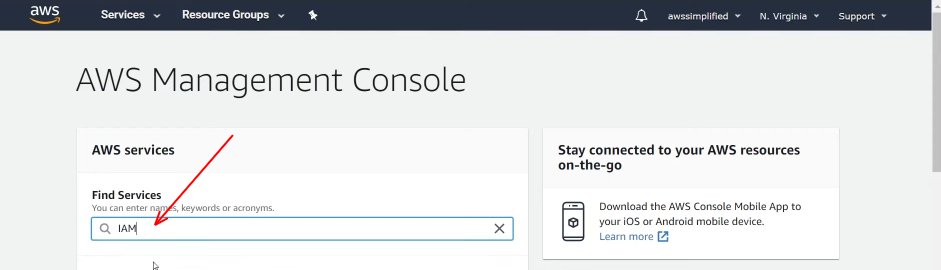
-> Log into your AWS dashboard and search for IAM (Identity Access Management) from the Find services search bar available in your dashboard
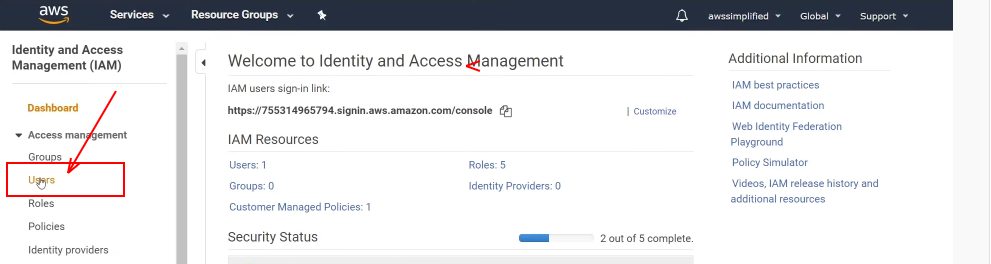
-> As a result of the above search IAM console page opens up, and on the left side, you can find an option as ” Users” click on it, and from here, we are going to create a user from scratch.
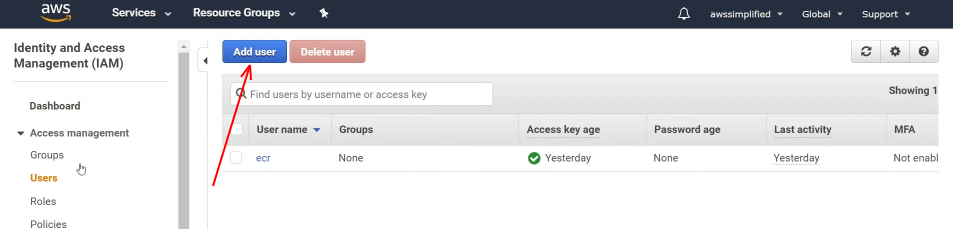
-> After clicking on “users,” now click on “ Add user”
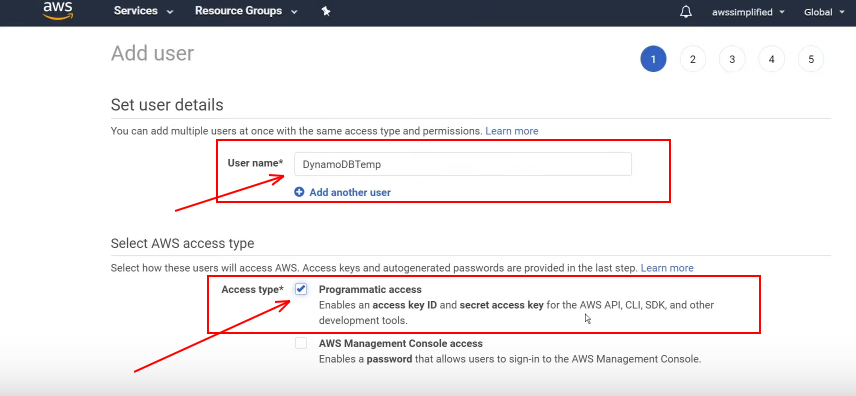
-> Now, in the next step, let’s create a username and access type. Here you are going to give yourself some DynamoDB permissions to create a table.
Note: If you want more liberal permissions, aka the abilities to create/modify/delete ANYTHING in your AWS account, that’s possible as well (more on that later).
Username : DynamoDBTemp
Access Type: Select Programmatic Access type
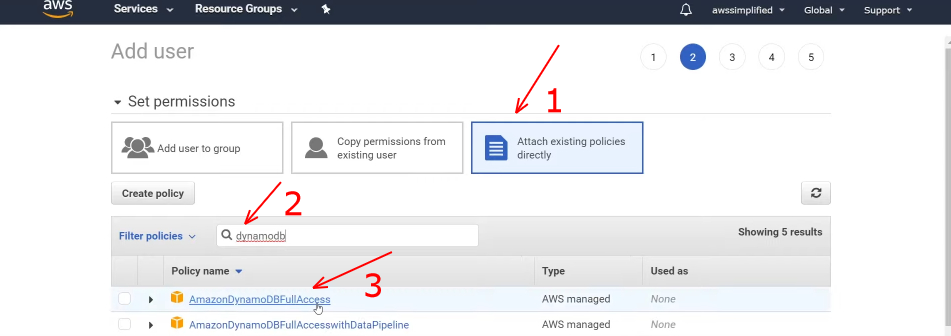
-> In the next step, we are going to attach a policy to this user, so click on “Attach existing policies directly” and say you want DynamoDB full access, for that you need to search for DynamoDB policies, and from its results, you need to select Amazon DynamoDB Full Access and finally click on Next button which is present at the bottom.
Note: If you want full AWS access – search and apply the policy called ‘Administrative Access’ instead of DynamoDB Full Access as described above.
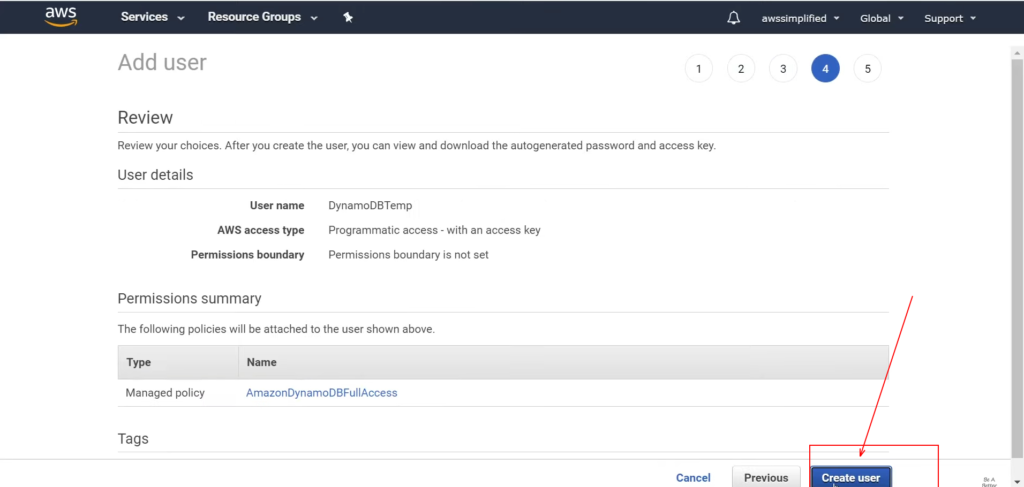
-> After clicking “next,” you will be directed to the Add tags page; it’s optional, so no need to bother about it right now; click on “Next” from the bottom of the page.
-> A Review page opens up to review your choices. Once you are sure, then click on “Create user.”
-> In few seconds, you will get a success message along with an Access Key ID and Secret Access Key
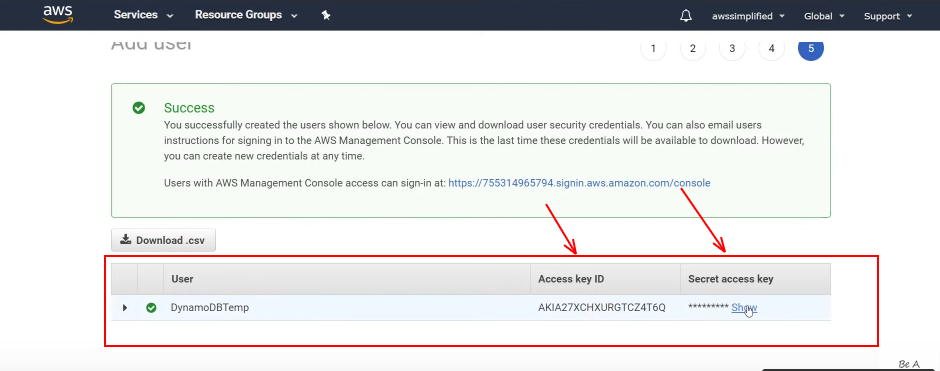
Please don’t close this window as you require the access key ID and secret access key in further steps to go so, make sure you copy it on your clipboard instead.
Note: you should keep your secret access as a secret obviously and don’t tell anyone because this is kind of like a token into your account, and if people have it, they can access your account to create infrastructure.
Step 3 – CLI Configuration
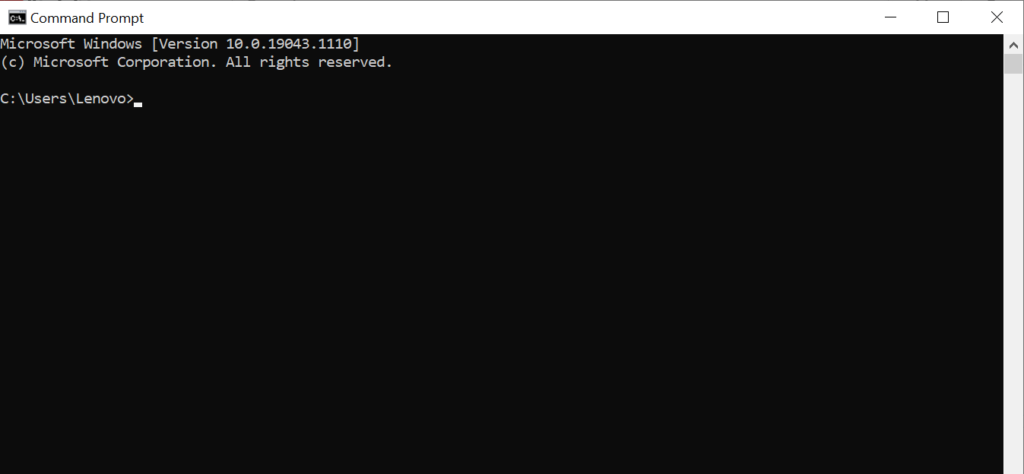
Now you have created a user profile with required permissions, and you are good to go; next, open the command prompt (in case you are not sure how to open a command prompt, then all you need to do is click the Start button(Windows icon) and then type “cmd” into the search box, and there you go). It looks something like below.
-> Now, you need to run a few commands in the command prompt. Let’s see one after the other in a sequence.
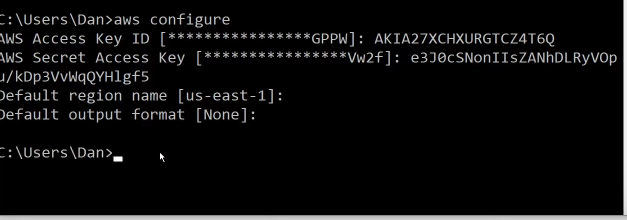
- Run the command “aws configure” in your command prompt.
- It will prompt us to ask for our access key id, and you need to copy it from your AWS console or from the clipboard if you already copied it earlier and paste it there.
- Now it asks us for the secret access key id, just go back again into your console or clipboard and copy the secret access key and paste it here in the command prompt, and press Enter.
- Now it’s going to ask for choosing a default region; you can choose your region according to availability, and as I am on the east coast so going with default US-East-1 here and press Enter.
- It prompts to enter default output, leave it as default, and press Enter.
Step 4 – Verification
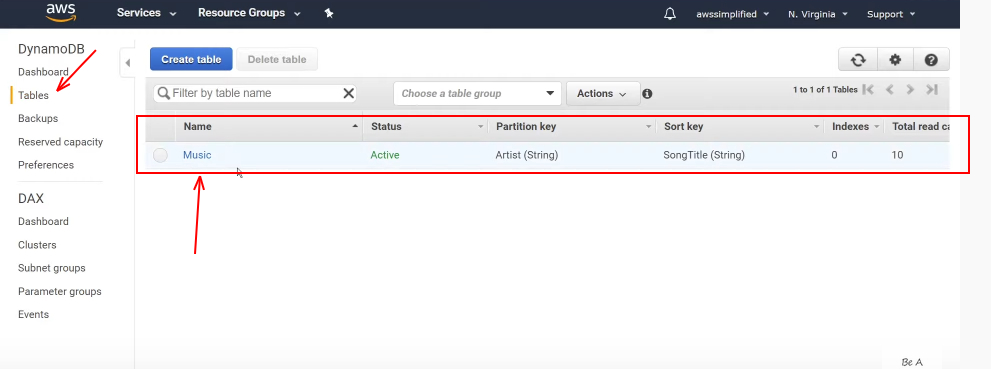
Now in this step, you will make sure that everything works fine, so to verify that you can create a dynamo DB table named music by running the below code.
aws dynamodb create-table \ --table-name Music \ --attribute-definitions AttributeName=Artist,AttributeType=S AttributeName=SongTitle,AttributeType=S \ --key-schema AttributeName=Artist,KeyType=HASH AttributeName=SongTitle,KeyType=RANGE \ --provisioned-throughput ReadCapacityUnits=10,WriteCapacityUnits=5

Now to verify that the table is created, go back to your AWS console, go into your DynamoDB dashboard, and from there, you click on “Tables,” and right there, you should be able to see a table created with the name Music.
So, if you followed everything as I said and got success with the verification step as well, then congratulations, you have successfully installed and configured AWS CLI on your Windows 10 system.
Final Thoughts
We hope the process of setting up AWS CLI is pretty much simple and straightforward, and if you are still not sure of anything here, then I already have a video tutorial on this; you can watch it further to make sure everything is okay. Again I am leaving the video link here.
I anticipate that this blog helped you in installing and configuring AWS CLI on Windows 10 successfully. If you wish to receive such amazing blogs in your mailbox then please feel free to subscribe to my newsletter and will see you soon with another interesting blog post. Until then keep learning more about AWS from my previous blog posts :).


